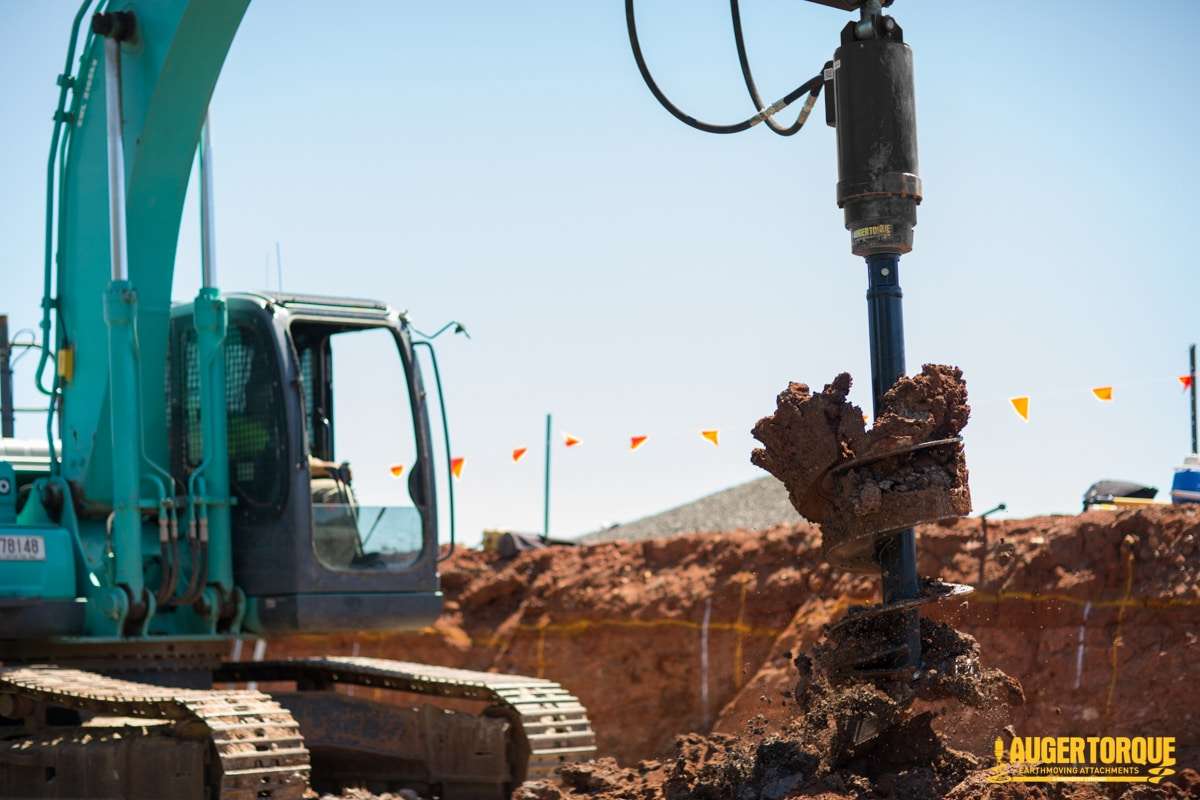
At The Attachment Company we have been providing auger setups to our customers longer than any other attachments in our range. We have experience in all sizes of auger setups for mini skid steers up to 30 ton excavators. A simple concept, however there are often many auger options for the exact same machine, depending on the job at hand, budget and many other variables.
We have created the ultimate auger guide to try and answer as many questions as possible and cover all the bases when it comes to auger setups for both skid steers and excavators. As always if you have any questions that we have missed you can post a comment underneath or contact us here.
Contents
- What is an auger setup and how does it work?
- Advantages of using an auger attachment
- Why it is important to select the correct auger drive for your machine
- Hydraulic Oil Flow & Pressure Specifications
- Mounting options for skid steers & excavators
- Output shaft sizes and auger diameters
- Auger Bit Types
- Auger Packages from The Attachment Company
What is an auger setup and how does it work?
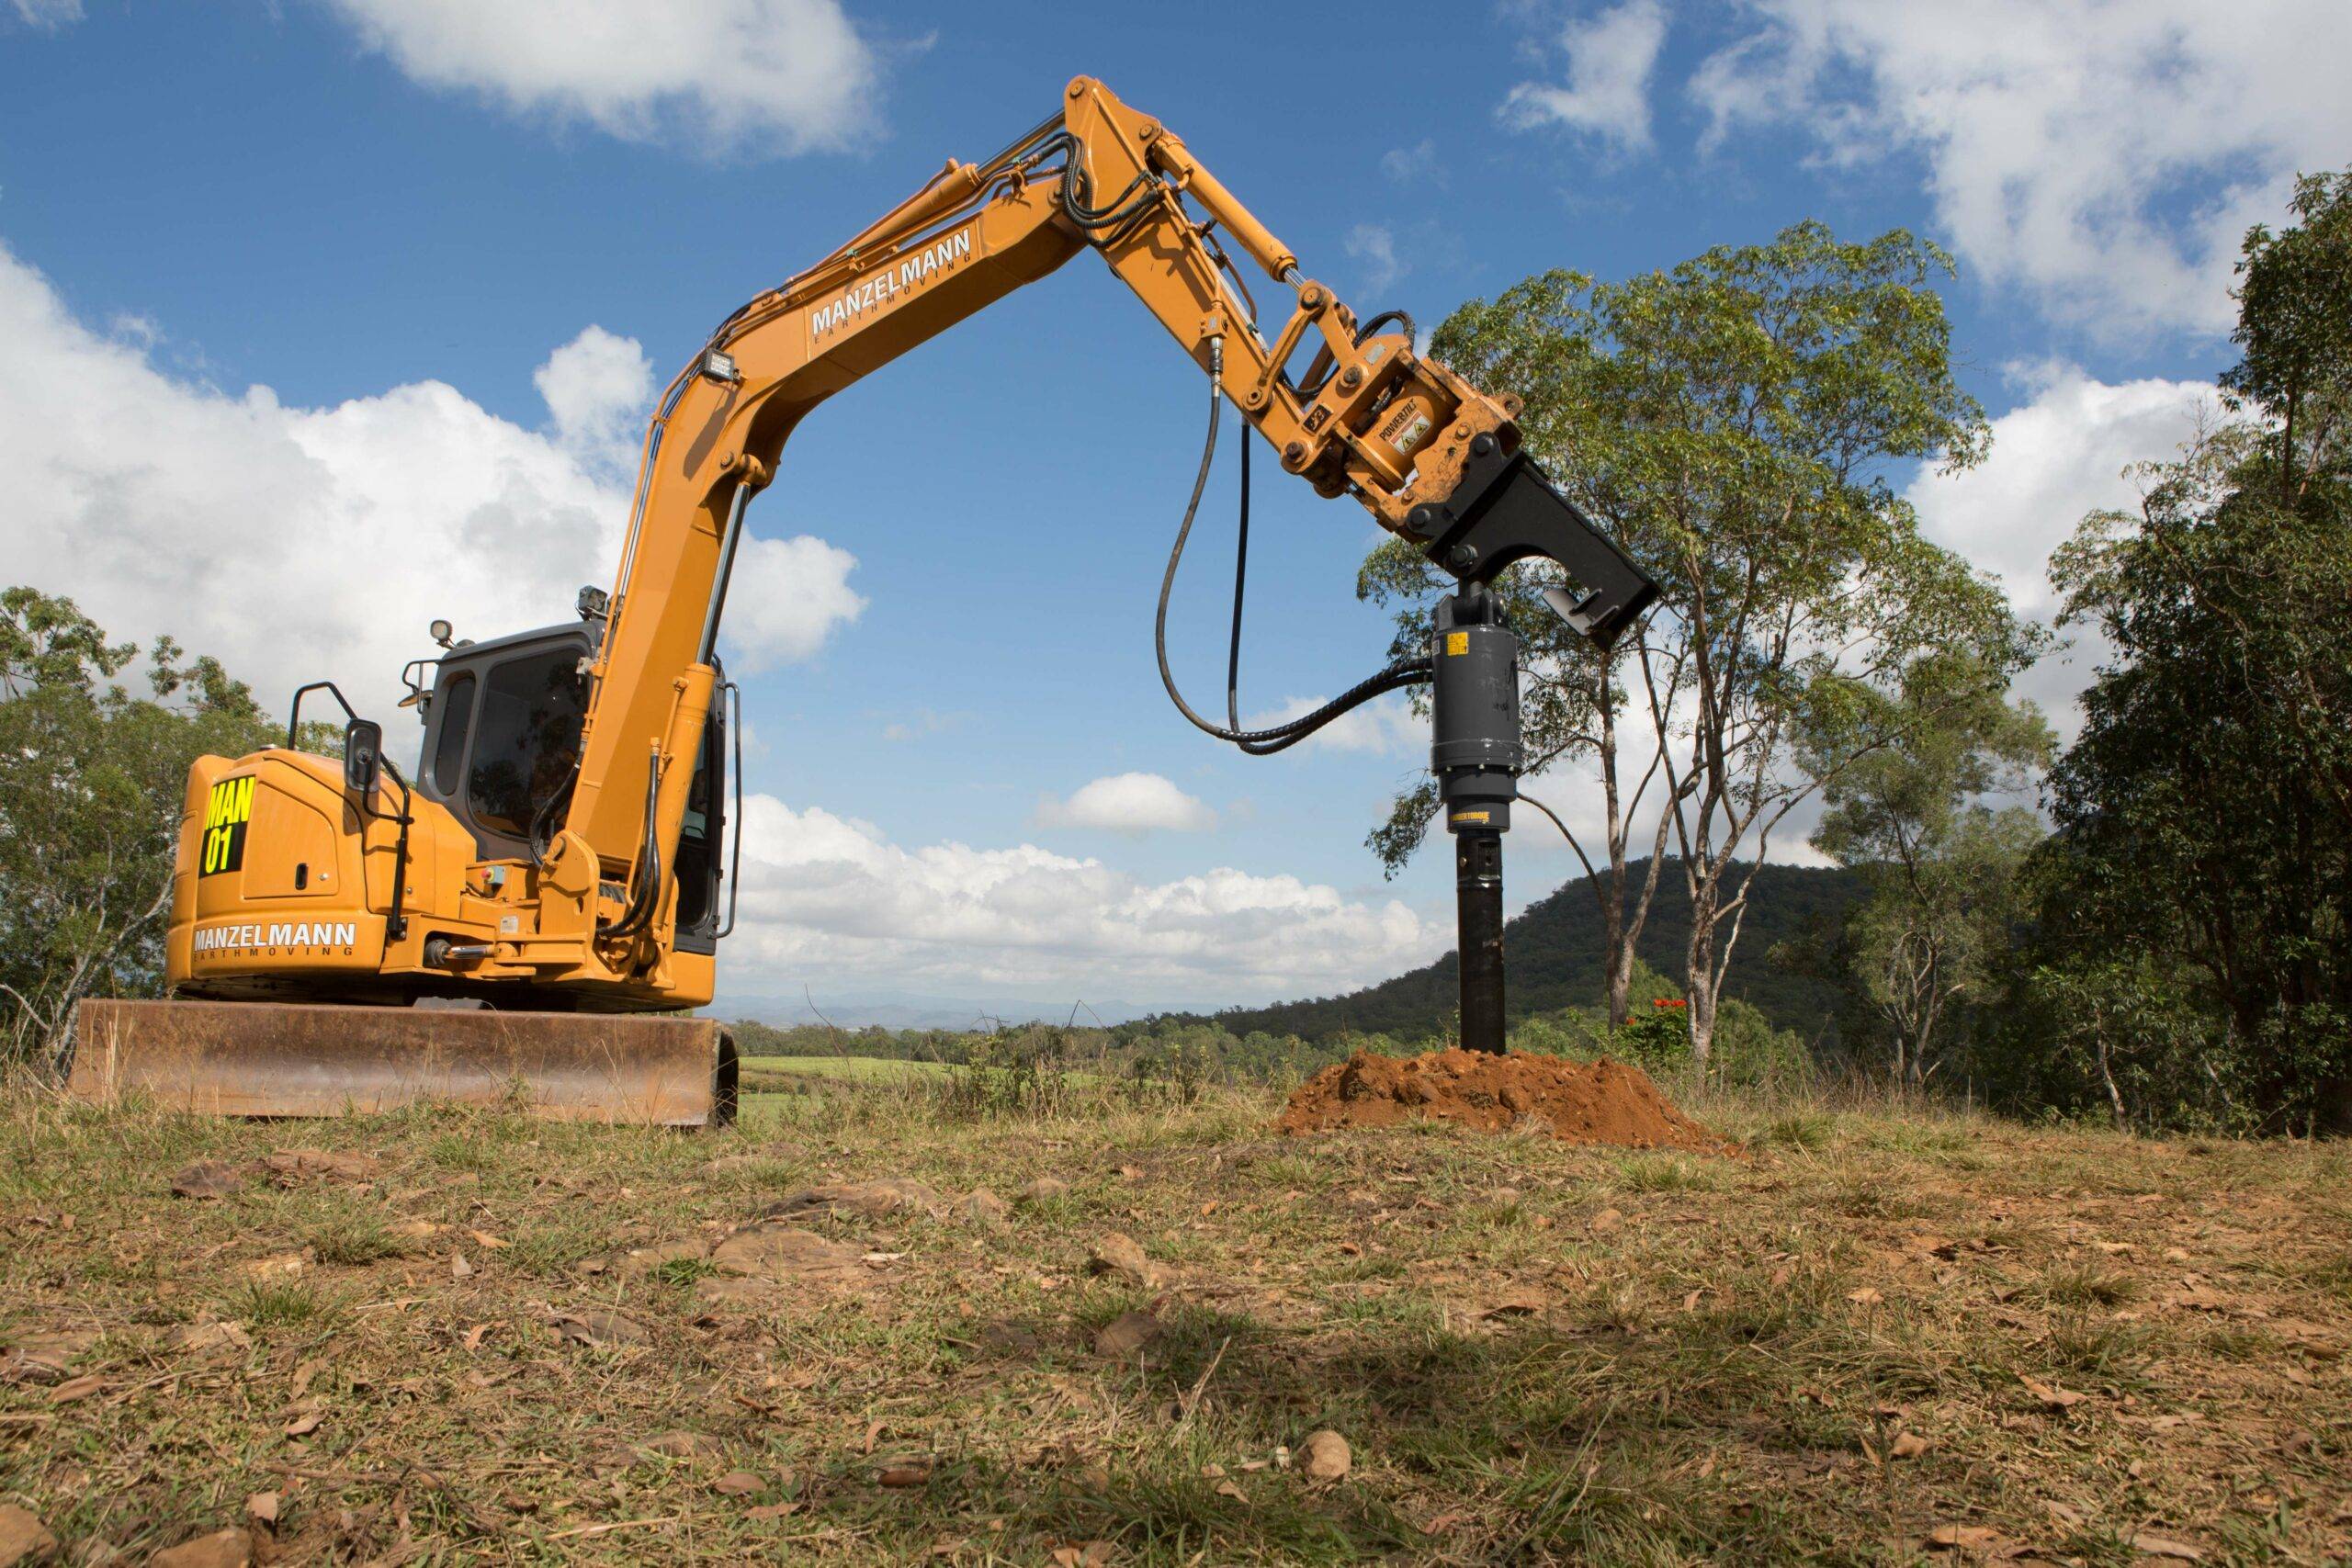
In the construction industry, auger drives are common on job sites of all shapes and sizes from small fence posts to large holes for screw pile foundations. While there are hand held auger units that you can rent from your local Home Depot, and also large dedicated drilling machines, we are just going to focus on the hydraulic auger drives that are suited for skid steers and excavators.
To cover the basics, an auger is just a large drill for drilling holes in the ground the same way that you would drill a hole in a wall, for example. Using the hydraulic capabilities of the piece of equipment, hydraulic auger drives were developed using hydraulic motors and planetary gearboxes.
A hydraulic motor just takes hydraulic oil flow and pressure inputs to turn an output gear
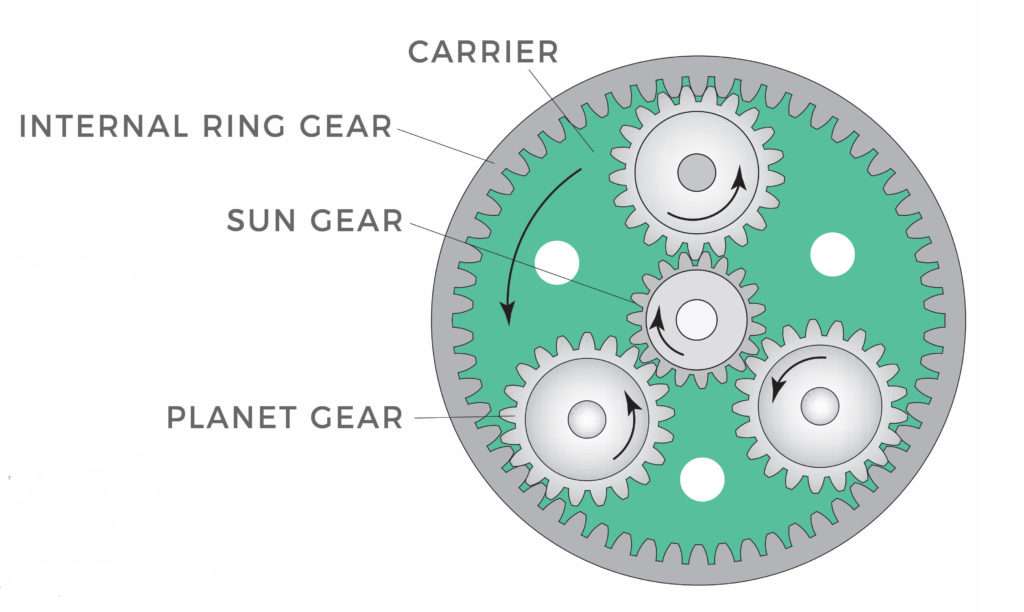
This motor is then matched with a planetary gearbox in order to amplify the torque output. A planetary gearbox is a common gearbox setup that transfers a high speed, low torque input into a low speed, high torque output. Keep in mind that more torque is the name of the game when it comes to drilling holes.
For each auger drive size, a gearbox is specifically designed to give the desired output torque and rpm to suit the needs of that specific size of machine. The more gear sets that are added to the gearbox, the more torque we will get as an output, but we lose speed in terms of revolutions per minute.
For example, for a smaller machine with a certain hydraulic flow and pressure output, there is a balance between getting enough torque to turn an auger into the ground, but also not losing all of the RPM. We will cover this more later when we look at the specifications of some of our popular auger drive units.
See below cutaway for an example of a fully assembled auger drive. On this smaller unit, there is only 1 set of gears in order to keep a good level of output speed as well as amplifying the torque.
Underneath the gearbox is the output shaft of the auger drive. This is what is used to connect to the auger bit that will in turn spin into the ground. See a picture of a full setup below:
Advantages of using an auger attachment
Now that we have covered the basics of the auger setup and how it works, you might be asking yourself why someone might need to spend more money on another attachment when they could just dig a regular hole?
The main advantage of using an auger as opposed to regular digging is that you can drill the hole to the exact size that is needed. This limits the amount of backfilling that is needed. For putting 4×4 posts into the ground, it would be impossible to dig a 6” diameter hole with a bucket. An auger setup lets you drill smaller as well as larger holes, deeper and faster than digging.
Another main advantage of using an auger setup is speed. Many customers that purchase an auger are drilling hundreds of holes per day for fence posts etc. An auger lets them drill the same size and depth of hole over and over again.
Why it is important to select the correct auger drive for your machine
All attachments for excavators, skid steers or any type of machinery have various options. When it comes to hydraulic attachments like augers there is often more than one size or option that will work, even on the same machine.
It is vital to select the correct model for a number of reasons. Firstly a unit that is not correctly specified, has a much greater chance of breaking down. This is especially true if a unit is undersized for the machine that it is fitted to. A machine with too much hydraulic pressure or oil flow will blow the motor or gearbox seals very quickly after use.
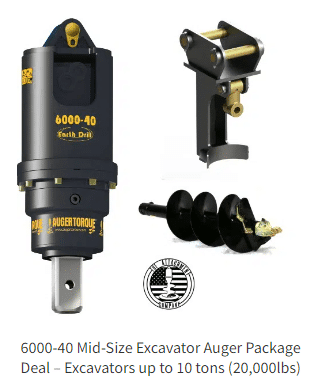
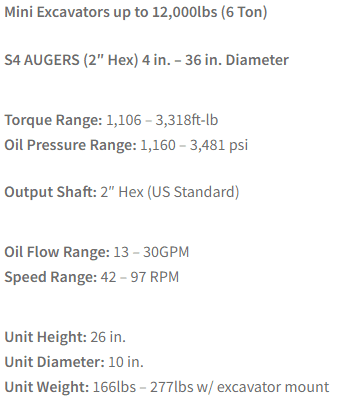
Every hydraulic attachment has an operating range for oil pressure and oil flow. We will cover these more in the next section. These are the two main factors when choosing a hydraulic attachment, after the overall weight of the machine. Most manufacturers will design the attachments operating ranges around a weight class of machines. For example our 6000-40 drive unit has the specs below and is designed to work with excavators in the 7-10 ton range.
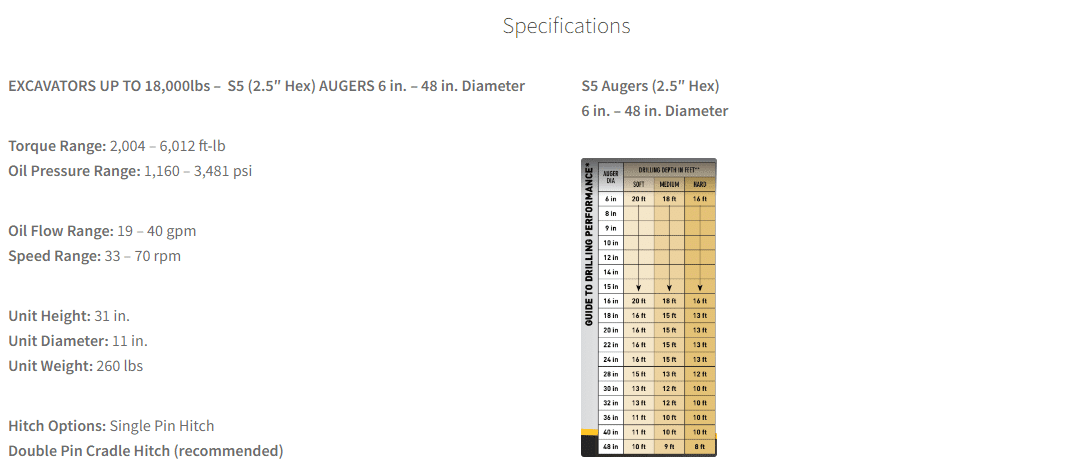
Also an undersized unit has greater chances of breaking or bending auger shafts and flights because it will not be designed to handle the weight of the machine that it’s on.
Equally though, an oversized attachment will not work properly or as designed due to the lack of hydraulic pressure or flow. As well as being too large and heavy for the machine. This is why it is important to select the correct size when looking at any attachments for excavator or skid steers.
At The Attachment Company we have attempted to make our range as narrow as possible, while still covering all of the needs of the industry. On our website we tend to display the operating ranges in the title of the product to make it easier to find what you are looking for.
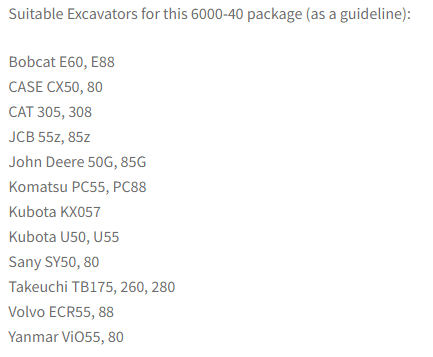
In the product listing you can find all of the important specifications and information about the attachment to ensure it will suit your machine. Most products have a rough guideline of the different machine makes and models that are suitable for the attachment. This doesn’t cover every machine, but will give a rough guide for similar machines.
Hydraulic Oil Flow & Pressure Specifications
Besides the weight of the skid steer or excavator, we use the hydraulic specifications of the machine to determine the correct auger attachment. As mentioned earlier, this would be the hydraulic pressure and hydraulic flow of the machine.
This can often get complicated as not every manufacturer makes it easy to find a certain machine’s hydraulic specifications, but usually a quick Google search will find what you need.
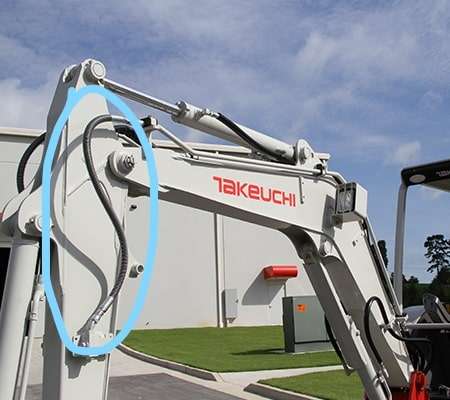
It’s important when searching for your machine’s hydraulic specifications that you find the pressure and flow relating to the auxiliary circuit of the machine. The auxiliary circuit is on the machine to run attachments. You can check your machine’s stick for hydraulic lines/ports as pictured below:
It is also important to note that some older machines may not have an auxiliary circuit or may have what we call a single acting hydraulic circuit. This is a circuit that only runs in one direction.
The way to tell if your machine has a single acting circuit is how it is operated. If, in the cab, the circuit is operated by a button or pedal, then it is likely a single acting circuit. If it is operated by a roller on the joystick, or a two way pedal then it is likely a two way/double acting circuit. This means that you can change the direction of flow. Most machines in the US now come with one double acting circuit, which is usually set up to run a hydraulic thumb.
It is vital to have a double acting circuit for an auger attachment, as you must be able to change the oil flow direction, in order to change direction of the auger. If you get stuck in the ground, you must be able to change the direction and back out, the same as drilling a hole with a hand drill.
After making sure your machine has the correct hydraulic capabilities we can determine the correct auger drive to suit your needs.
For this example we will use a Takeuchi TB240. Here you can find the specs on the TB240. Under “Hydraulic System” we can find that the Auxiliary Hydraulic Flow is 17.1GPM or 64.9LPM.

We can then compare that to one of the excavator auger drives on our website. As mentioned above we list our products by weight range for excavators and flow rates for skid steers.
Under the excavator category we find the 3300-30 model for excavators up to 6 tons.
After clicking on this package we can find the detailed specs.
This unit will run on a flow range of 15-30GPM which suits the 17GPM of the Takeuchi TB240. The 3,481psi Hydraulic System Pressure of the TB240 also falls within the range of the TB240. This drive will be ideally suited for this machine.
Under the 3300-30 package we also list the output speed and output torque of the unit depending on the machine’s capabilities.
On the TB240 this drive unit will output just over 55RPM and around 2,900ft-lbs of torque.
For skid steers we use the same process, although it is even easier as we list all of our skid steer drives by flow range. Most standard skid steers fall into the LC300 category while some high flow models can use a larger drive for more torque.
Mounting options for skid steers & excavators
Mounting options for auger drives are fairly simple. Skid steers are the easiest so we will start there.
Most skid steers use the universal mounting system. For more information on this you can read our skid steer attachment guide here. This will cover most applications.
Mini skid steers have a smaller version of the same idea. Here are some manufacturers that share the mini skid steer mounting system:
Vermeer
Toro/Dingo
Ditch Witch
Boxer
Some other mini skid steers use their own style such as:
Bobcat MT’s
ASV RC30/Terex PT30
Excavator Mounting Options
Excavators are a little more complex as there isn’t a universal mounting system like the skid steer hook up. Each machine uses different pin dimensions and this affects what buckets or mounts will fit correctly.
Many hydraulic couplers that are fitted on machines can pick up a range of pin dimensions but not all.
The pin dimensions shown below are what is needed to build an excavator mount to suit your machine.
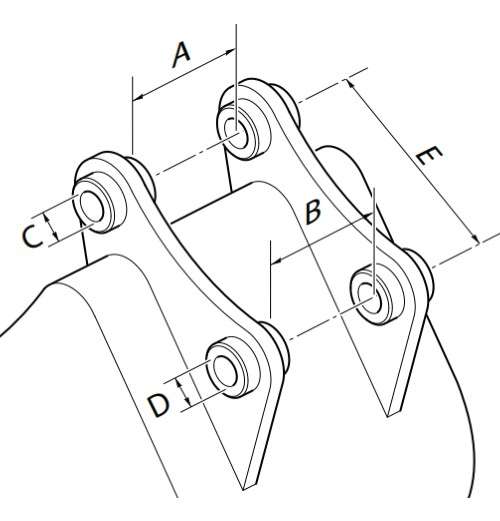
A & B = Machine’s Stick/Dipper Width
C & D = Pin Diameters
E = Pin to Pin Centers
These measurements vary from machine to machine. We have a very in depth list of machine dimensions that can be found here.
If you can not find your machine on the list – not to worry, you can always just take a coupler measurements from a bucket or attachment that fits on your machine.
Single Pin Mount
On the smaller drives you can avoid the hassle and lead time of building a mount, by using a single pin mount that mounts through the main pain or dipper of the machine. This is the cheapest and easiest solution but doesn’t give as much control of the unit.
Double Pin Mount
The other two options require fabrication and will often have a short lead time to build.
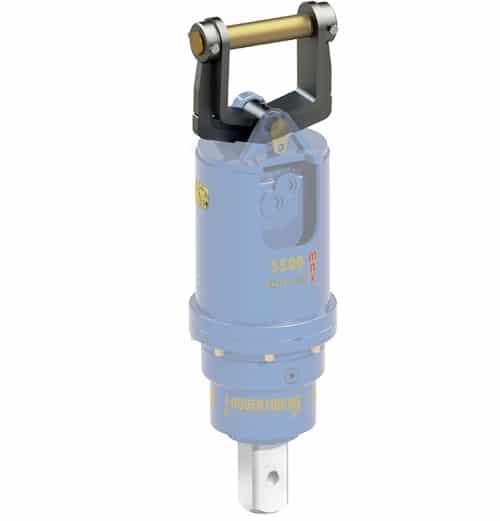
Double Pin Cradle Mount
You can see the difference between the two mounts is one has what we call a “cradle” and one does not. The cradle allows you to tuck the drive in when moving the machine and stop it from swinging.
It also allows you to reverse the mount and hold the drive horizontally for horizontal drilling. Where possible we recommend the cradle mount as it also makes it easier to change out auger bits too. But there is a price difference between the two, so as always it depends on the application/budget.
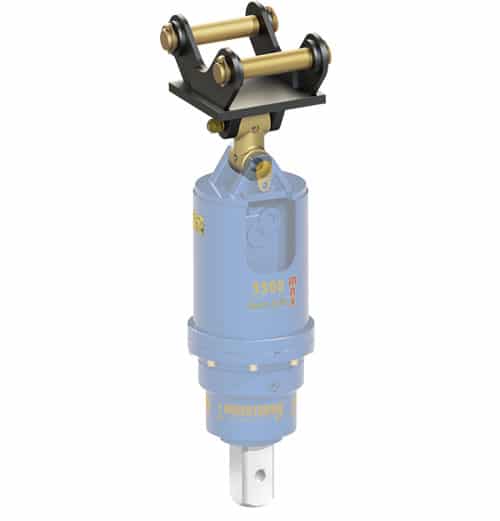
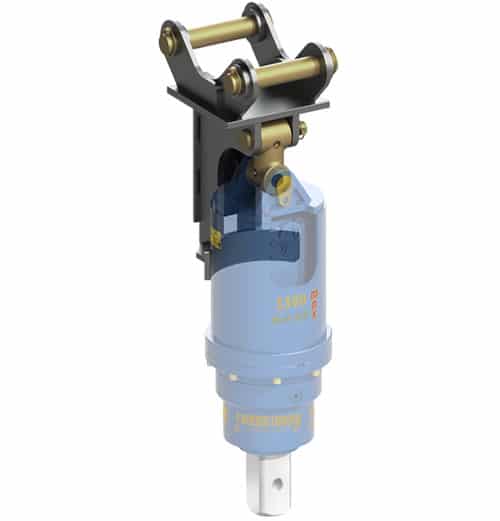
At The Attachment Company we build double pin and double pin cradles in house, and try to keep the lead time to 1-2 weeks.
Output Shaft Sizes and Auger Diameters
Many different regions of the world use different size output shafts and augers compared to the US market. Below is a rough guideline for the drives and augers that we supply:
| Type of Machine | Standard Output Shaft Size (USA) | Recommended Auger Diameters |
| Mini Skid Steers | 2″ Hex or 2-9/16″ Round | 4″ – 24″ |
| Skid Steers & Mini Excavators | 2″ Hex or 2-9/16″ Round | 4″ – 36″ |
| High Flow Skid Steers & Excavators up to 10 tons | 2.5″ Hex | 6″ – 48″ |
| Excavators from 10 to 22 tons | 3″ Square (75mm) | 6″ – 60″ |
| Excavators over 22 tons | 4.33″ Square (110mm) | 12″ – 72″ |
The above table is a rough guideline and can vary from manufacturers.
In the US market the 2” Hex drive is by far the most popular and The Attachment Company only offers 2” hex drives on the smaller units. However there are adapters available to switch between round and hex and even from 2.5” hex down to 2” hex etc.
The auger diameter range is also a rough guideline and depends on the ground conditions, torque output etc.
Auger Bit Types
As with all other aspects of the complete auger setup, there are more than one option when it comes to auger bits.
These vary depending on the drive that will be turning it as well as ground conditions and more. Again, we try to break down our range to separate the different auger sizes to suit the specific drives in the range.
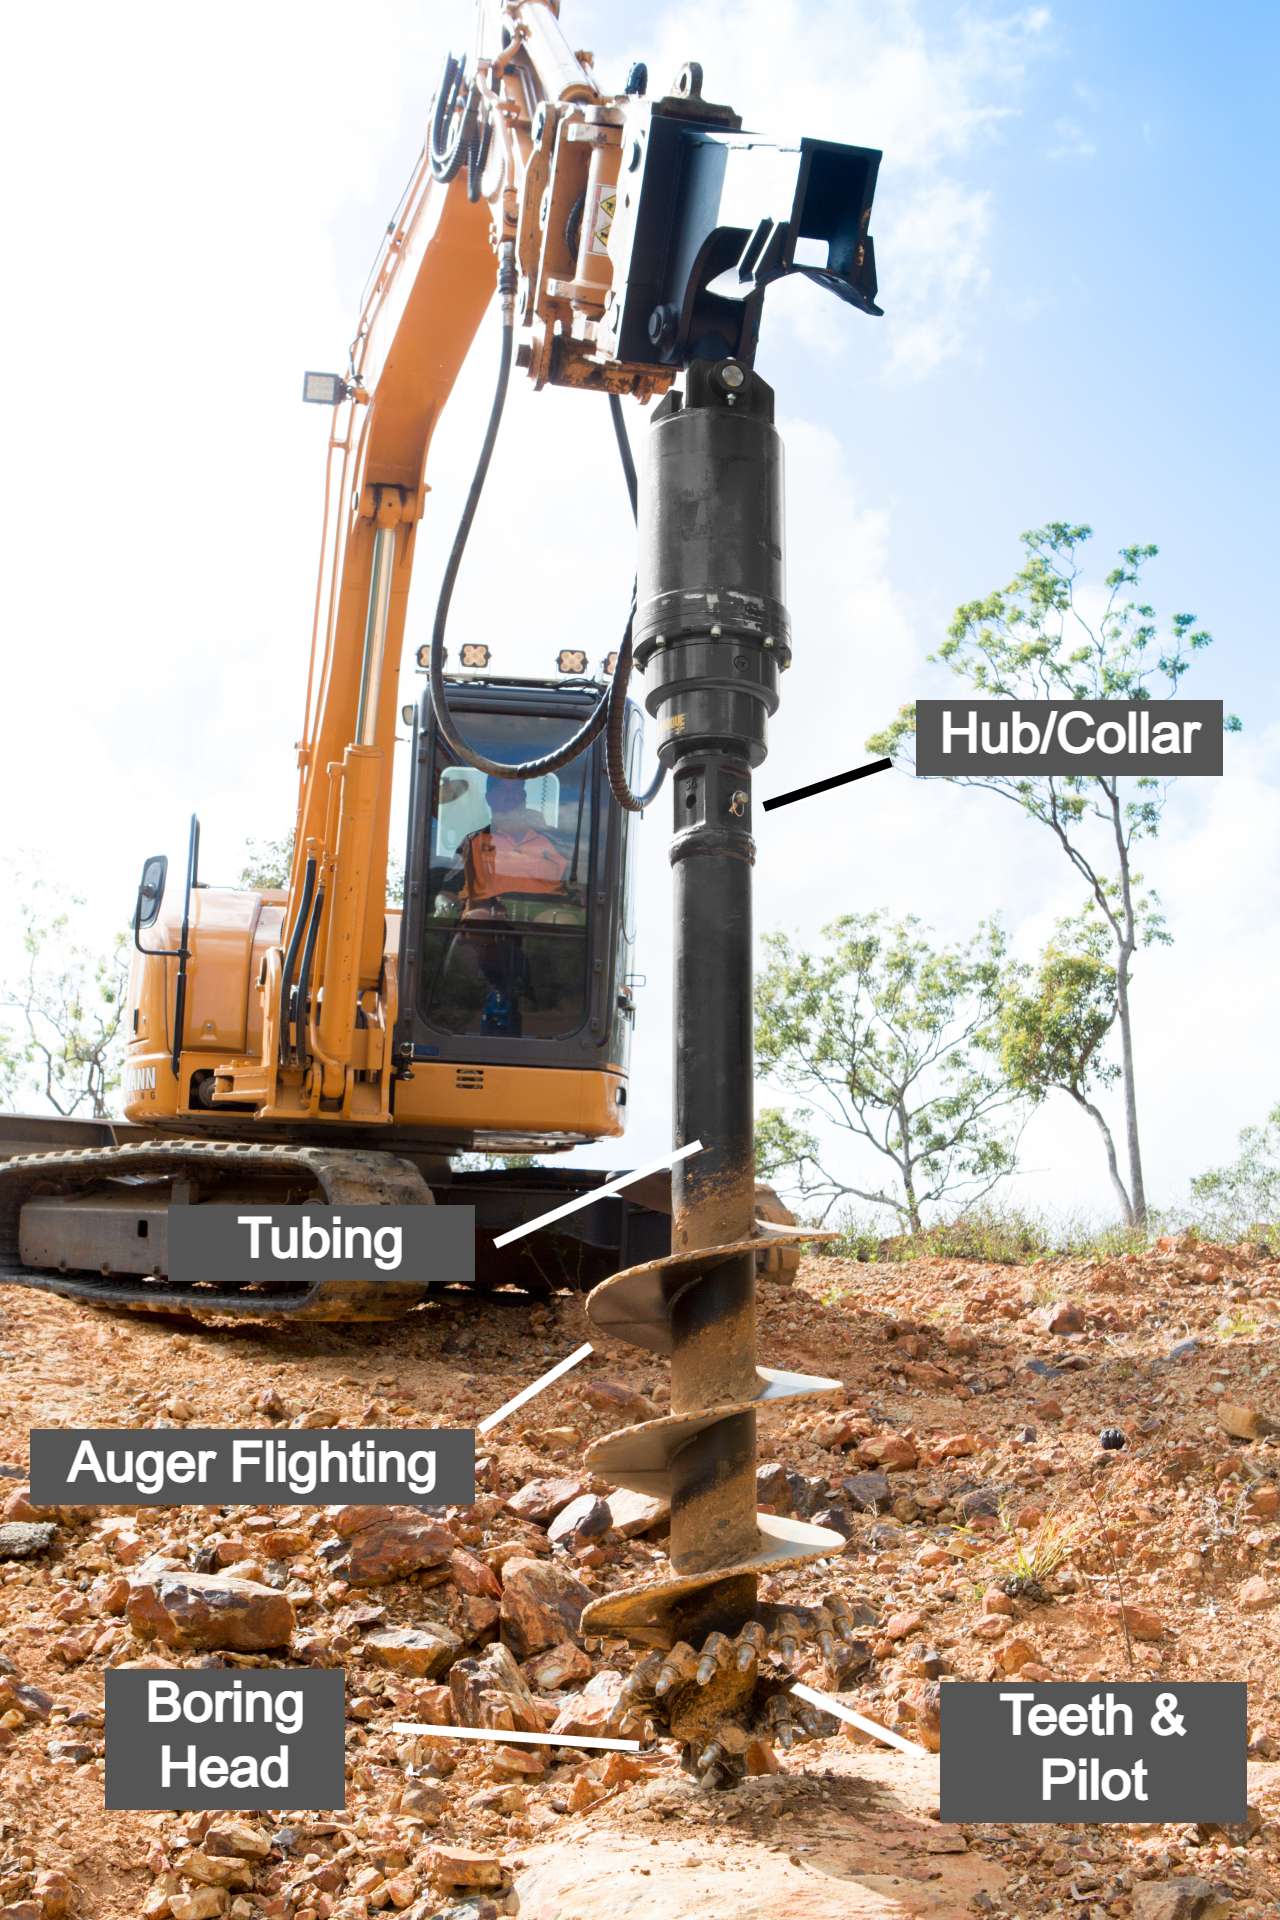
Of course, larger drives with more torque require a heavier auger with thicker flighting and tubing etc. First let’s look at the details of an auger bit and the different components.
The diagram shows each part of the auger bit.
Hub/Collar: Changes depending on the output shaft size as discussed the chapter before
Tubing: The size and wall thickness of the round tubing increases with the torque output of the drive in order to cope with the torque and stress
Auger Flighting : The flighting changes depending on the diameter of the auger. The thickness also increases as the drives get larger. Some heavy duty rock augers start with a thicker fighting and then step down further up the shaft.
Boring Head: The boring head designs can vary from flat regular augers to tapered and then to spiral rock augers like in the diagram above. This all depends on the ground application and severity of the conditions.
Teeth & Pilot: Teeth and pilot change spending on the ground. Regular augers have a more flat style tooth and rock augers have more aggressive round style as above. All teeth and pilots are replaceable for when they wear out.
Auger Packages from The Attachment Company
The Attachment Company offers auger packages of all sizes that enable you to get all of what you need to get straight to work. This makes it easier to place an order and make sure you have everything included.
We have split up packages into Mini Skid Steer, Skid Steers & Excavators. Many packages share the same drive units and augers, but the only difference is often the mounting system.

If there are any other items that have to be added to an auger package, you can always get in touch with us here!


I need something that will do24” &a stump planer I have a 2015 tl10 Takeuchi high flow
Hi Charlie,
Thanks for the message! We have a listing for the standard flow and high flow units here – https://attachmentco1-dev.10web.site/product/skid-steer-auger/
The 3300-30 will work on your standard flow mode, the 6000-40 would utilize your machine’s high flow. It will have around double the torque output that the 3300-30 will have.
Both units will power a 24″ auger and the 6000-40 could be used to turn a 14″ diameter stump planer, whereas I’d only use the 10″ planer on the 3300-30. https://attachmentco1-dev.10web.site/product/auger-torque-stump-planer/
If you can send me your information, I can send you over a full quote including freight etc. Let me know if you have any questions.
Thanks
Andrew
The Attachment Company